
*** Mix each Part (base-filled Epoxy Part A & the filled hardener Part B) individually before mixing together and with Basalt chopped fibres
In Transom repair: Ensure that the cavity is dry. Remove all rotted timber and vacuum clean. Scrub both inner and outer skins with Acetone before using TransCore and leave dry. Plug any holes that will leak the liquid TransCore. Once you have determined the correct quantity of material needed to fill the cavity (see TransCore Calculator) , firstly stir the Part B Hardener back to a smooth product (components separate over time), once stirred, add the Part B Hardener to the Part A Base and mix well. When fully mixed - Base and Hardener, (add only the smallest amount of Xylene - if needed to make it easier to pour the mix in confined places), and lastly add in the Basalt fibre pack to the other mixed components. Mix no more than the 20 kg Kit at a time. Your working time will vary greatly because of local climatic conditions, but it could be as little as 20 mins or as long as 35 minutes (in cold weather). Each kit has 3 components (1. The base-filled Epoxy Part A, 2. The filled hardener Part B and 3. The bag of Basalt chopped fibres). It is critical to mix the Part A to the Part B in ratio 3:1 by weight, exactly the correct amount of components (especially the hardener supplied) with each kit. Only after the Parts A and B have been thoroughly mixed are the Basalt fibres lastly added. To mix the product in large quantities, it is best to use a heavy-duty 100mm (4") double-blade mixing attachment with a heavy-duty drill with a 12mm (½”) or larger chuck. Mix the product for 3 minutes. Please note that TransCore will expand slightly when mixed and will generate a slight amount of heat. Hand mixing with a stirring stick is fine for small amounts.
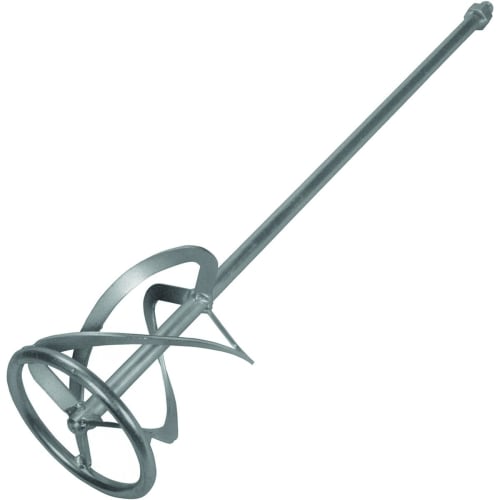 (Suggested mixing drill attachment for large mixes - for smaller? use stick)
After approximately 5 hours, or better, once the material has fully solidified, carefully remove the dammed panels and inner and outer transom skins bracing (used to keep the transom straight until the TransCore has set. Now you will be fine to continue with any other work on the transom. Like all epoxies, full strength is obtained over the following days.
* For those wanting to understand a little more about the concept of Transom cores? And why have the two skins (inner and outer)? I have picked-up snippets from various sites, but I think the one from Fiberglassics.com (thank you to them) as it does cover the subject very well and is shown further below.
In Industrial applications for plastic and cast iron replacement: As TransCore can be cast into a silicone mould, it is now easy to make a copy of any existing product by simply making a silicone mould of the item (we sell silicone moulding compound), then removing the original item from the mould when set, and finally filling the mould with TransCore. For industrial tooling, TransCore can be moulded for use as Dies for pressing applications. If trying to build thickness into any project with layer after layer of resin and fibreglass? Why not simply spread trowel a thick layer of TransCore over the area required! The uses are endless for this lightweight, high strength filler.
For cruising boaties: A kit of TransCore is so handy for strong emergency repairs while at sea. Simply mix components and trowel on by hand as a temporary fix until reaching port. (thank you to BoatLIFE for photo)
![]()
The Core Principles explained FYI:
Please Note: Since the conditions of application and use of our products are beyond our control, no warranty is expressed or implied regarding the accuracy of the information, the results to be obtained from the use of the product, or that such use will not infringe on any patents. The information is furnished with the express condition that you will make your tests to determine the suitability of the product for your particular use.